
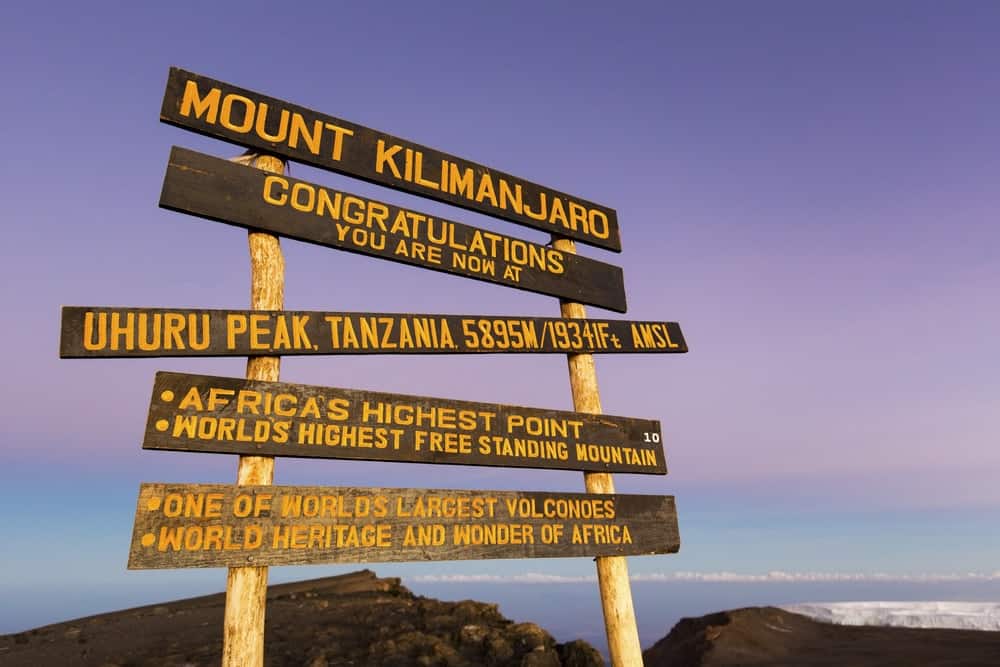
Climbing Mount Kilimanjaro, the roof of Africa standing at 19,341 feet (5,895 meters), is a monumental achievement. The journey takes you through five distinct climate zones, a trek often compared to walking from the equator to the Arctic. This extreme variation in temperature and weather, from tropical heat to sub-zero cold, makes proper packing not just a matter of comfort, but of safety and success. An ill-prepared climber risks discomfort, altitude sickness, and even abandoning their summit attempt.
This comprehensive guide, synthesized from expert advice and seasoned climbers, provides a definitive packing list for your 2025 Kilimanjaro adventure. By understanding the “why” behind each item, you can pack intelligently and face the mountain with confidence.
Before You Pack: Understanding the Kilimanjaro Challenge
Effective packing begins with understanding the environment you’re about to enter. Kilimanjaro’s unique geography presents challenges that dictate your gear choices.
The Five Climate Zones of Kilimanjaro
As you ascend, you’ll traverse five major ecological zones, each with its own climate. Your clothing must be versatile enough to handle this incredible range. The trek from the gate to the peak can see temperatures swing from over 80°F (27°C) to well below 0°F (-18°C), a fact confirmed by numerous trekking experts.
The Rainforest Zone (1,800-2,800m) is warm, humid, and, as the name suggests, prone to rain. An umbrella can be surprisingly useful here, as wearing full waterproofs can be too hot. The trails are often muddy, flanked by lush, moss-draped trees.
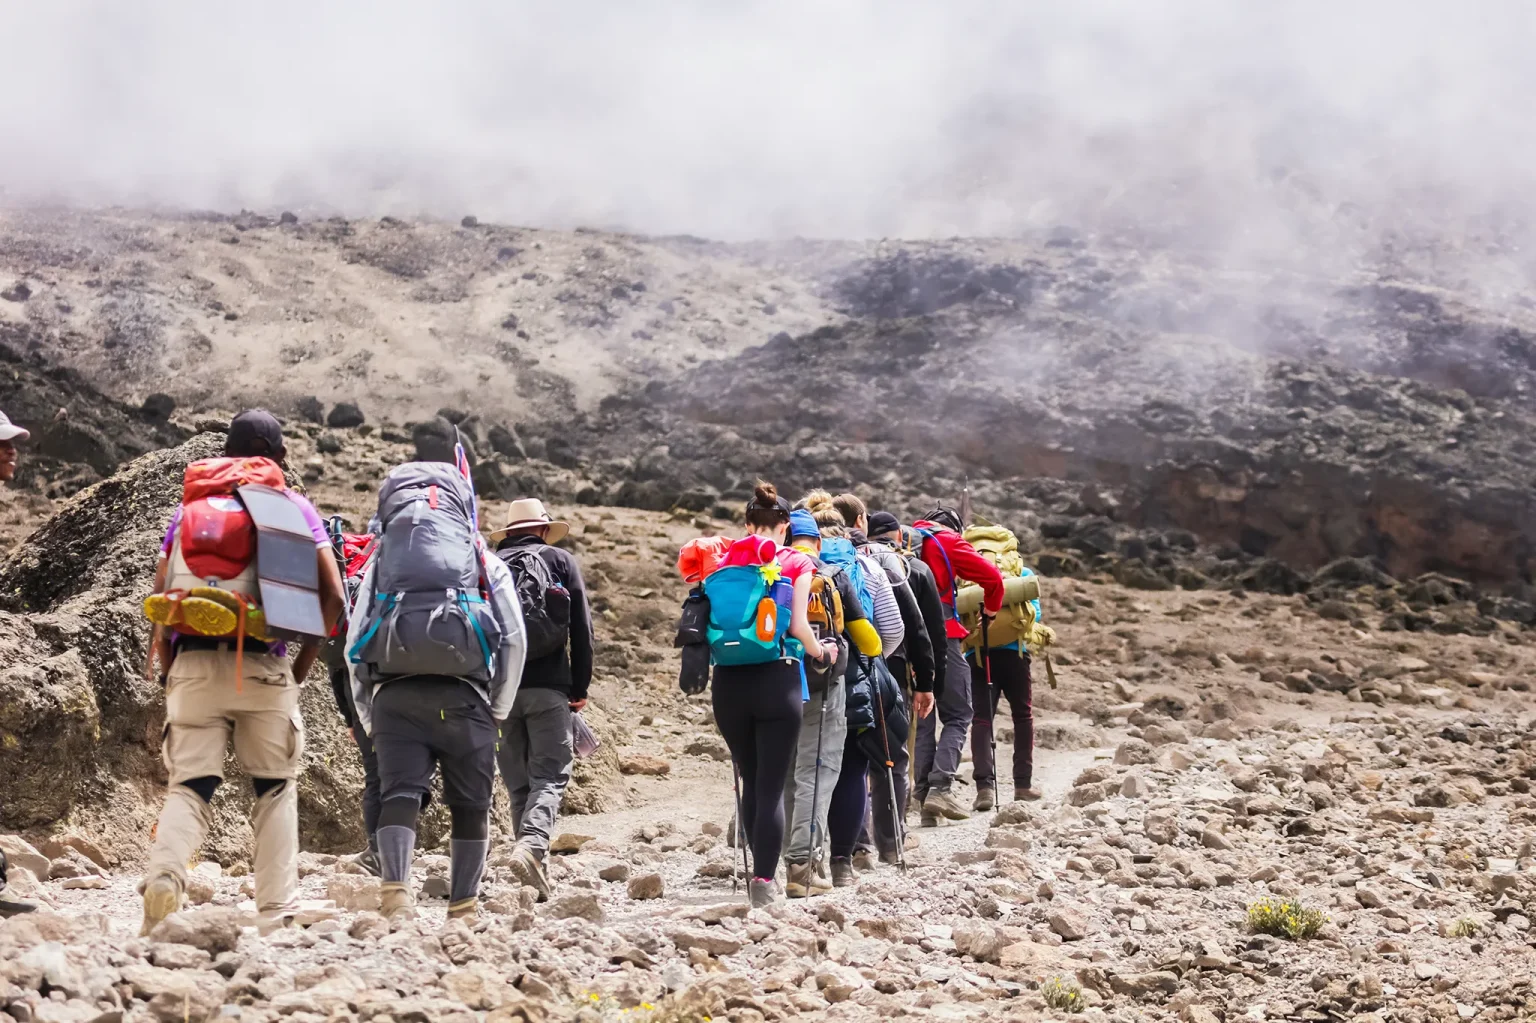
Higher up, the Alpine Desert Zone (4,000-5,000m) presents a stark contrast. It’s a barren, rocky landscape with sparse vegetation, intense sun during the day, and temperatures that plummet below freezing at night.
Acclimatization and Route Choice
Your body needs time to adjust to the lower oxygen levels at high altitude. The biggest mistake climbers make is ascending too quickly. Choosing a longer route, such as the 8-day Lemosho or 9-day Northern Circuit, significantly improves your chances of acclimatizing properly and reaching the summit safely. A longer trip means packing for more days, but it’s the single most important factor for success.
The Two-Bag System: Daypack vs. Duffel Bag
On Kilimanjaro, you operate with a two-bag system. Your main gear is carried by a porter, while you carry a daypack with your daily essentials. Understanding this system is key to packing efficiently.
Your Duffel Bag: The Porter’s Load
This is your main piece of luggage. It will contain everything you don’t need during the day’s hike, such as your sleeping bag, spare clothes, and toiletries. Porters will carry this bag from campsite to campsite.
- Type: A waterproof or water-resistant duffel bag is essential. Look for rugged materials and a durable zipper.
- Size: Most operators recommend a capacity of 80 to 100 liters.
- Weight Limit: This is crucial. For the porters’ welfare, there is a strict weight limit of 15 kg (33 lbs). This limit is enforced by Kilimanjaro National Park authorities and reputable trekking companies. Pack everything inside waterproof stuff sacks to protect against rain.
Your Daypack: Your Daily Essentials
You will carry this pack every day. It should be comfortable and large enough to hold everything you might need between camps, as you won’t have access to your duffel bag until the evening.
- Size: A capacity of 30 to 40 liters is sufficient for most climbers.
- Key Contents: At a minimum, your daypack should contain your water supply (at least 3 liters), rain gear (jacket and pants), an extra warm layer (like a fleece), sunscreen, sunglasses, snacks, a camera, and your personal first-aid kit. A rain cover for the pack itself is also highly recommended.
Mastering the Mountain: The Essential Clothing Layering System
The secret to staying comfortable across Kilimanjaro’s diverse climates is layering. This system allows you to add or remove clothing to perfectly regulate your body temperature. As experienced guides explain, wearing multiple thin layers is scientifically warmer than a single thick one because the trapped air between layers provides insulation.
“The technical clothing you bring on the mountain can be categorized into… base layer, mid layer, and outer shell. Each performs specific functions and together it will protect you from the peak’s harshest weather.”
Base Layer: Moisture Management
Worn against your skin, the base layer’s job is to wick sweat away from your body to keep you dry. Staying dry is critical for staying warm. Absolutely no cotton! Cotton absorbs moisture and will make you cold. Opt for materials like Merino wool or synthetics (polyester, polypropylene).
Mid Layer: Insulation
This is your primary warming layer. Its purpose is to trap body heat. Fleece jackets are a popular, breathable, and lightweight choice. For colder conditions, especially on summit night, a second, heavier insulating layer like a puffy jacket (filled with down or a synthetic equivalent) is essential. Down offers the best warmth-to-weight ratio but loses its insulating properties when wet, whereas synthetics perform better in damp conditions.
Outer Layer (Shell): Weather Protection
Your final layer is your shield against the elements. A high-quality waterproof and windproof jacket (hard shell) is non-negotiable. Look for high-performance breathable fabrics, which block rain and wind while allowing sweat vapor to escape. A matching pair of waterproof pants is equally important.
The Complete Kilimanjaro Packing Checklist
Here is a comprehensive checklist synthesized from multiple expert sources. Remember to adapt it to your personal needs and the gear provided by your tour operator.
Technical Clothing
- Base Layers: 2-3 moisture-wicking long-sleeve shirts, 1-2 short-sleeve shirts, and 1-2 pairs of long underwear bottoms (lightweight or midweight).
- Mid Layers: 1-2 fleece or soft-shell jackets (one light, one heavier), 1 pair of fleece pants.
- Insulated Jacket: 1 warm, insulated “puffy” jacket (down or synthetic). This should be a substantial parka, not a lightweight down sweater.
- Outer Shell: 1 waterproof/breathable jacket with a hood (hard shell) and 1 pair of waterproof/breathable pants (side-zippers are very useful).
- Hiking Pants: 1-2 pairs of comfortable, quick-drying trekking pants. Convertible (zip-off) pants are a versatile option.
- Underwear & Socks: 4-5 pairs of moisture-wicking underwear. 4-6 pairs of wool or synthetic hiking socks (a mix of liner, midweight, and heavyweight thermal socks for the summit).
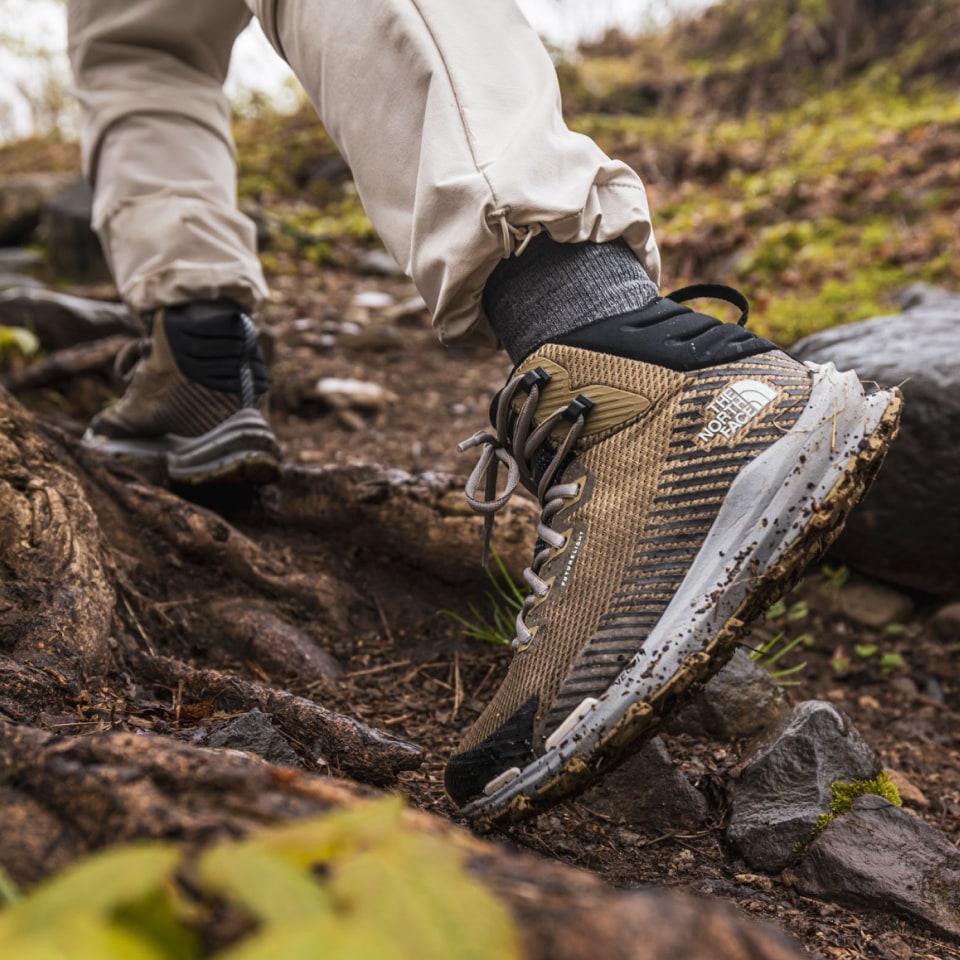
Footwear: Your Most Critical Gear
Your boots can make or break your trek. Do not skimp here. They must be comfortable, durable, and well-suited for the terrain.
- Hiking Boots: Mid-weight, waterproof boots with good ankle support are essential. Most importantly, they must be thoroughly broken in before your trip to prevent blisters. Reputable outdoor footwear brands are frequently recommended by guides.
- Camp Shoes: A pair of comfortable trainers or sandals to wear around camp in the evenings, giving your feet a break from your boots.
- Gaiters: Optional but recommended to keep mud, dust, and scree out of your boots.
Headwear & Handwear
- Sun Hat: A wide-brimmed hat for sun protection.
- Warm Hat: A fleece or wool beanie for warmth.
- Balaclava or Buff: Extremely versatile for protecting your face and neck from sun, wind, and cold.
- Sunglasses: High UV protection, glacier-rated sunglasses are a must for the intense sun at altitude.
- Gloves: 1 pair of lightweight liner gloves and 1 pair of heavyweight, waterproof, and insulated gloves or mittens for the summit.
Essential Equipment
- Duffel Bag (80-100L) & Daypack (30-40L): As described above.
- Sleeping Bag: A four-season sleeping bag rated to at least 0°F to -15°F (-18°C to -26°C) is required. A compression sack helps save space.
- Trekking Poles: Highly recommended to reduce stress on your knees, especially during the long descent.
- Headlamp: Essential for navigating around camp at night and for the pre-dawn summit push. Bring spare batteries.
- Water System: Capacity to carry 3 liters. This can be a combination of water bottles and/or a hydration bladder. Note that bladder tubes can freeze on summit night, so insulated tubes or using bottles as a backup is wise.
Personal First-Aid & Toiletries
While guides carry comprehensive medical kits, you should bring a personal kit for minor issues.
- Blister Treatment: Specialized blister plasters are lifesavers.
- Pain Relievers: Ibuprofen or Paracetamol for headaches and muscle aches.
- Gastrointestinal Meds: Anti-diarrhea and anti-nausea medication.
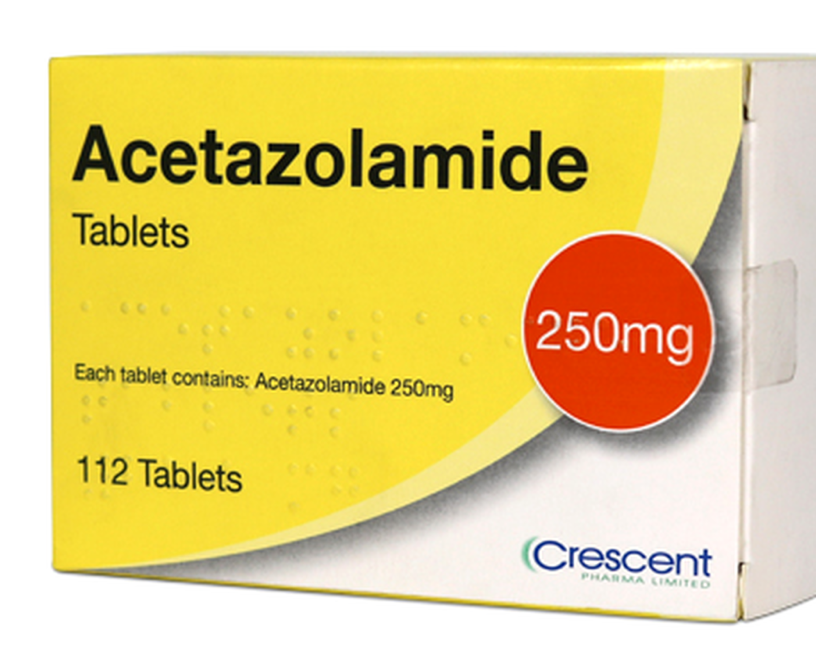
- Prescription Medications: Bring any personal prescriptions, plus consult your doctor about altitude sickness medication. Acetazolamide is a medication commonly prescribed to help prevent and treat Acute Mountain Sickness (AMS). It works by speeding up acclimatization but does not mask symptoms. A trial run before your trip is recommended to check for side effects.
- Toiletries: Sunscreen (SPF 30+), lip balm (SPF 30+), wet wipes, hand sanitizer, toothbrush, and toothpaste. A pee bottle can be very useful for avoiding cold nighttime trips to the toilet tent.
Documents & Miscellaneous
- Travel Documents: Passport (valid for 6+ months), Tanzanian visa, flight details, travel insurance information.
- Cash: For tips for your guides and porters (guideline is ~$250-300 per climber, but check with your operator) and any personal expenses.
- Electronics: Camera, phone, and a power bank (cold weather drains batteries quickly).
- Snacks: Energy bars, gels, nuts, and candy. While meals are provided, personal favorites are great for morale and quick energy boosts.
Final Preparations: Pro Tips for a Successful Climb
- Train Seriously: While you don’t need to be an elite athlete, you must be in excellent physical shape. Focus on cardiovascular fitness and long day hikes with a weighted pack for at least two months prior to your climb.
- Pack Critical Gear in Your Carry-On: In case of luggage delays, carry your hiking boots, a full hiking outfit, and any essential medications on the plane with you.
- Don’t Overpack: Adhere to the 15kg duffel bag limit. Every extra pound is carried by a porter. Pack smart, not heavy.
- Put Tomorrow’s Clothes in Your Sleeping Bag: A classic mountaineering trick. Stuffing the clothes you’ll wear the next day into the bottom of your sleeping bag makes for a slightly less frigid morning dressing experience.
Conclusion: Pack Smart, Climb Strong
Packing for Kilimanjaro is a strategic exercise in preparation. By understanding the mountain’s challenges and meticulously following a well-researched gear list, you set yourself up for a safer, more comfortable, and ultimately more successful journey to the summit. Your gear is your support system on the mountain; choose it wisely, test it thoroughly, and trust in your preparation. The roof of Africa awaits.


